
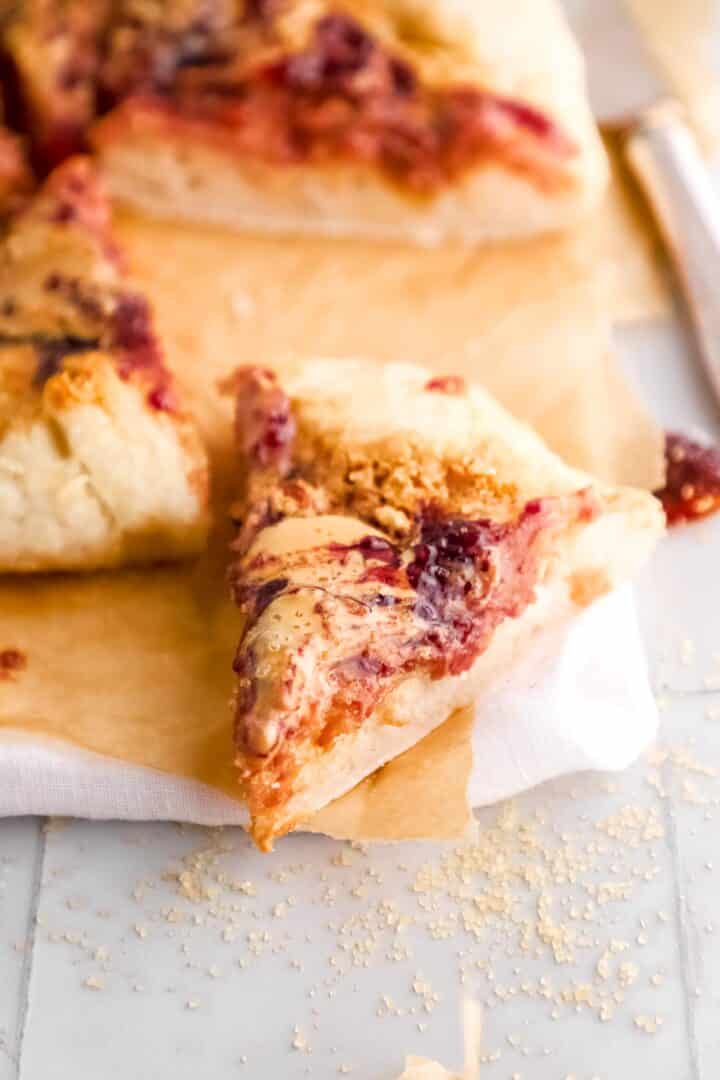
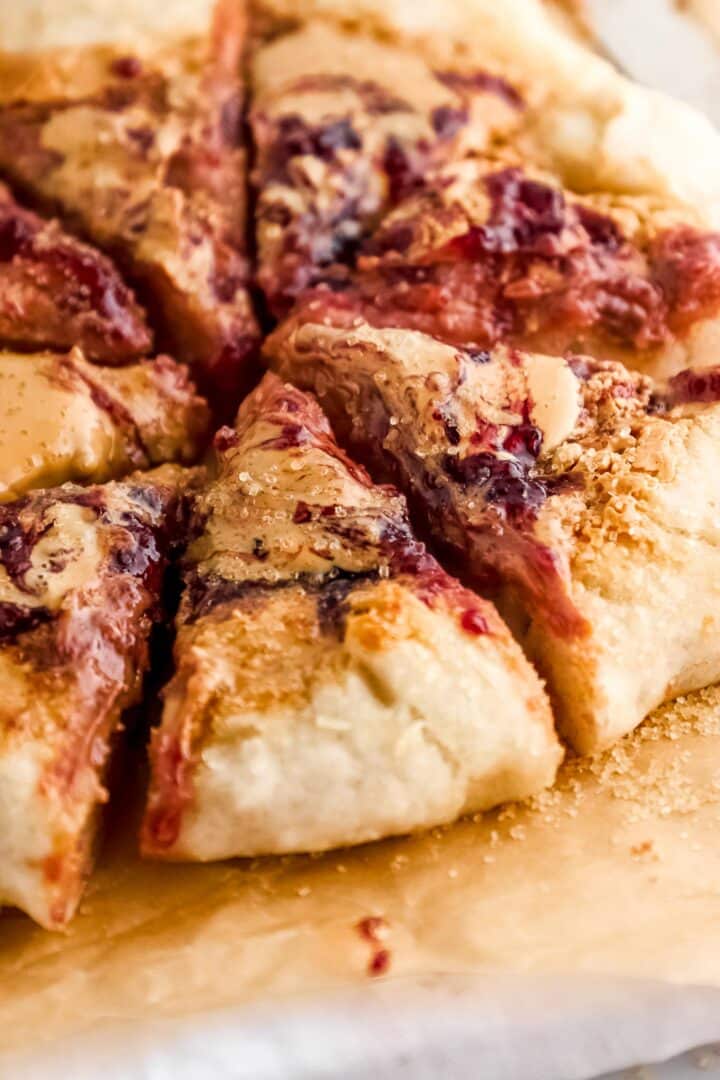
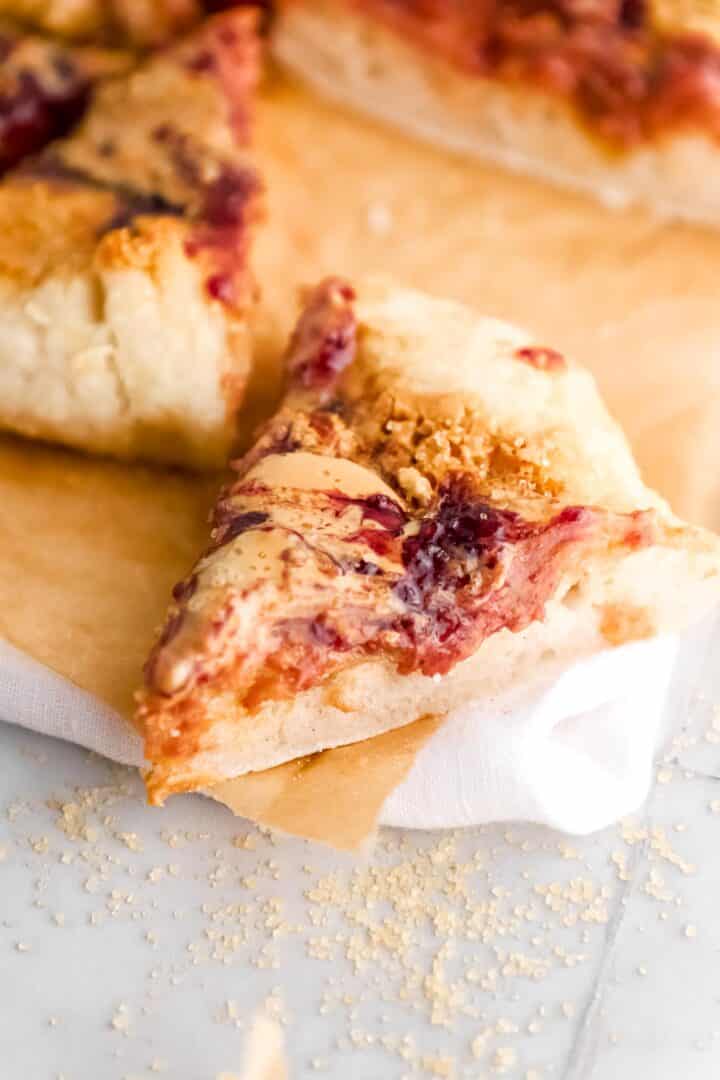
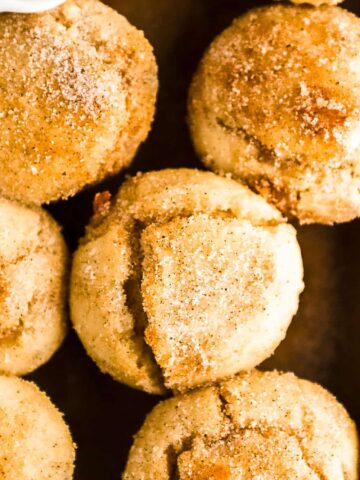
Are you looking for a fun and unique twist on pizza night? Look no further than this gluten-free PB&J Pizza recipe. This recipe takes the classic peanut butter and jelly sandwich and transforms it into an amazing pizza. Perfect for a fun dessert or a late-night snack, this recipe is sure to be a crowd-pleaser.
Tried this recipe? Please leave a star ⭐️⭐️⭐️⭐️⭐️ rating below and/or a review in the comments section down the page. You can also stay in touch with me through social media by following me on Instagram, Pinterest, and TikTok or by subscribing to my newsletter.

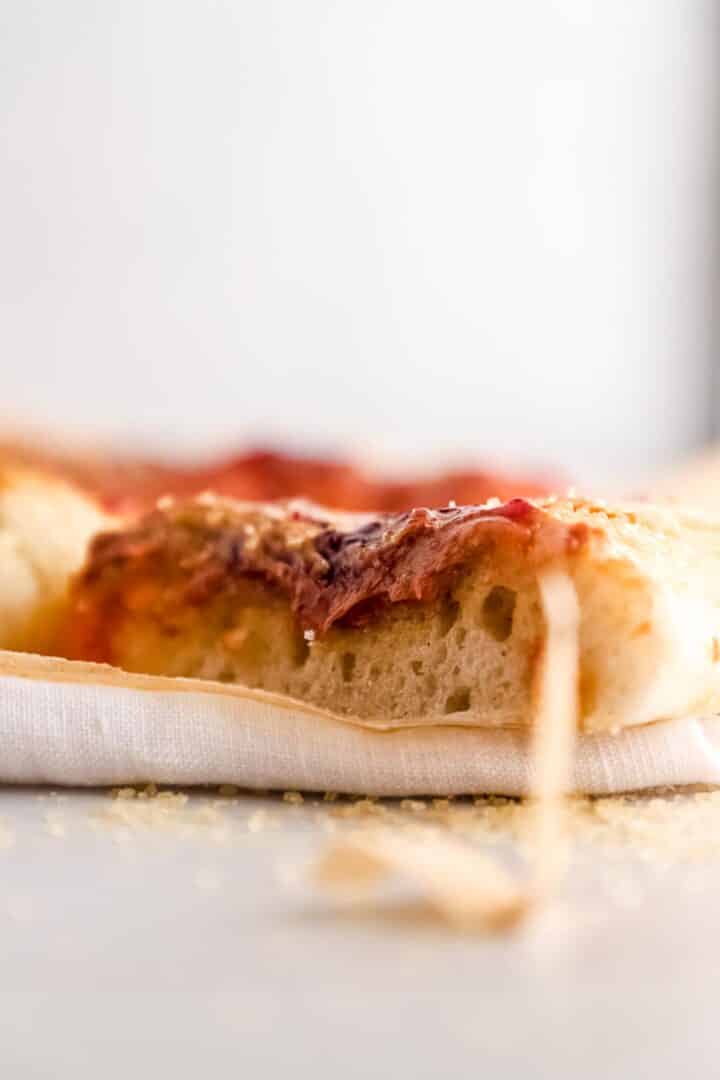
The crust of this pizza is made from wholesome ingredients, making it a healthy snack option. This recipe is perfect for personal pizza-sized portions and is easy to cut into wedges for a school snack idea or party appetizer. The crust is made from a mixture of flour, salt, yeast, water and sugar, which results in a delicious pizza crust that is perfect for this recipe.
So next time you're looking to change up your pizza night, give this gluten-free PB&J Pizza recipe a try. It's a fun and delicious way to enjoy the classic flavor of a peanut butter and jelly sandwich in a whole new way. Perfect for a fun dessert or a late-night snack, this recipe is sure to be a crowd-pleaser.
Looking for more gluten-free recipes? Check out How to Make the BEST Oven Dried Orange Slices, Gluten-free Andes Mint Crumbl Cookie Recipe, and Copycat Gluten Free Cheez It Crackers Recipe.
What is peanut butter and jelly pizza?
- Peanut Butter and Jelly Pizza is a fun and unique twist on the classic pizza
- It is made from a gluten-free crust that is made from wholesome ingredients
- The pizza is topped with peanut butter and jelly, similar to a jelly sandwich
- It is a yummy snack that can be enjoyed as a dessert or a late-night snack
- It is easy to make and can be cut into personal-sized portions for a fun snack
- Perfect for school snack ideas and party appetizers
- The crust is made from a mixture of flour, salt, yeast, water and sugar
- The peanut butter and jelly can be swirled together on top of the crust before baking
- A great alternative for those with gluten intolerance or gluten allergies.
Is this recipe gluten free?
Yes, this recipe is gluten-free. The key to making this dough is using Caputo gluten-free flour, which does not contain xanthan gum. This gluten-free flour ensures that the dough is completely gluten-free and suitable for those with gluten intolerance or gluten allergies.
Key Ingredients
- Caputo Gluten-Free flour is the main ingredient in this recipe, it ensures the dough is gluten-free
- Active dry yeast is used to make the dough rise and create a fluffy crust
- Warm water is used to activate the yeast and create the yeast mixture
- Granulated sugar is added to the yeast mixture to help activate the yeast
- Natural peanut butter is used to spread on the crust before baking
- Strawberry Fruit spread is used as a topping to give a natural fruit flavor
- Avocado oil is used to brush the crust before baking for a crispy texture
- Coarse sugar is used for sprinkling on the crust for added sweetness and texture
- Salt is used to bring out the flavors in the crust dough

Step-by-Step Instructions
Making the Dough:
- In a separate mixing bowl, whisk together 2 teaspoons of granulated sugar with 2 cups of warm water.
- Add 2 ½ teaspoons of active dry yeast (I use Caputo yeast) and let the yeast mixture bloom for 15 minutes.
- In a separate mixing bowl, mix together 4 cups of gluten-free flour and 2 teaspoons of salt.
- Slowly add the yeast mixture to the flour mixture and mix until just combined.
- Cover the dough with a warm damp towel and let it rise for 1 hour in a warm place.
Forming the Pizza:
- Preheat the oven to 450 degrees.
- Punch a fist into the dough once it’s risen and divide it into 4 sections for mini pizzas or 2 sections for large pizzas.
- On a clean surface, form the dough into pizza rounds.
- Transfer the crust to a parchment-lined baking sheet.
Topping the Pizza:
- Brush the crust with 2 tablespoons of avocado oil.
- Spread a layer of natural peanut butter in the center of the unbaked crust, leaving 1 inch around the edges.
- Use a spoon to place jelly circles on top of the peanut butter
- Use a toothpick to gently swirl the jelly with the peanut butter.
Baking the Pizza:
- Sprinkle 1 tablespoon of coarse sugar on top of the crust.
- Bake in the oven for 8-12 minutes or until golden brown.
- Let the pizza cool for 2-3 minutes before slicing into wedges.
- Serve and enjoy
Expert Tips
- Before beginning, coat your pans and bowls with vegetable cooking spray to prevent sticking.
- Use a piece of parchment paper to line your baking sheet.
- For larger circles, use a rolling pin to roll out the dough to your desired size.
- Use a spoon to place a circle of jelly on top of the peanut butter.
- To prevent sticking, coat your clean work surface with flour before shaping the dough.
- Brush the crust with a light coating of avocado oil before baking for a crispier crust.
- Use your fist to punch down the dough before dividing it into sections.
- Keep an eye on the pizza in the oven, it should be golden brown before taking it out.
- Let the pizza cool for a few minutes before slicing into wedges.
- Enjoy your delicious Peanut Butter and Jelly Pizza!
What gluten free flour should I use?
When it comes to gluten-free flour, there are several options available. Caputo gluten-free flour and King Arthur All-Purpose gluten-free flour are two popular options. The key is to use a gluten-free flour that does not contain xanthan gum, as it can affect the texture and rise. Using gluten-free flour without xanthan gum will ensure that your dough comes out perfectly.
Recipe Variations
- For a sweeter taste, add a teaspoon of honey to the peanut butter before spreading it on the crust.
- Add banana slices on top of the jelly for a unique twist on the classic PB&J.
- For a savory pizza, add a teaspoon of kosher salt and 1 tablespoon of extra-virgin olive oil to the dough before rising.
- Substitute the strawberry jam with grape jelly or any other natural fruit spread of your choice.
- Serve as a side dish with a fruit salad for a different take on snack time.
- Mix in some chocolate chips to the dough for a sweet and savory combination.
- Add some bacon crumbs to the pizza for a savory twist.
- Add some chopped nuts for added crunch.
- Serve it with some whipped cream for a dessert pizza.
Ingredient Substitutions
- If you're looking for a different pizza topping, you can use any natural fruit spread of your choice.
- If you don't have gluten-free flour, you can use plain pizza dough or pre-made, thin crust pizza dough.
- You can also use a pre-cooked pizza crust and just add the peanut butter and jelly on top.
- In case you don't have avocado oil, you can use any other type of oil to brush the crust before baking.
- If you don't have granulated sugar, you can use any other type of sugar.
- You can use any type of jelly or jam to top the pizza, such as raspberry or apricot.
- You can use almond butter or any other type of nut butter instead of peanut butter.
Recommended Equipment
- Mixing bowl
- Measuring cups and spoons
- Parchment paper
- Baking sheet
- Mixer with dough hook
- Pizza cutter or sharp knife
- Spatula
- Cooling rack
- timer
Serving Suggestions
- Cut the jelly pizza into wedges and serve as a fun dessert or late-night snack.
- Serve it as an appetizer at parties or gatherings.
- Pack it in a lunch box for a school or work snack.
- Serve it with a side of fruit salad.
- Top it with some whipped cream for a sweet treat.
- Cut it into small bite-sized pieces and serve as a finger food at a party.
- Serve it with a scoop of vanilla ice cream for a dessert pizza.
- Enjoy it warm or cold.
- Add some chocolate chips on top for added sweetness.
- Enjoy it plain or add some nuts or bacon crumbs for a savory twist.
Storage Instructions
- Allow the pizza to cool completely before storing.
- Store it in an airtight container in the refrigerator for up to 3 days.
- To reheat, place the pizza in the oven at 350 degrees for 5-7 minutes or microwave it for 30 seconds.
- You can freeze it, wrapped in plastic wrap or foil, for up to 2 months.
- Let it thaw overnight in the refrigerator before reheating.
- Avoid storing it at room temperature as it will lose its texture and freshness.
FAQ
Yes, you can use any type of jelly or jam for this recipe. Some popular options include grape jelly, raspberry jam, or apricot jam.
Yes, you can use any type of nut butter for this recipe such as almond butter or cashew butter.
Yes, you can use a pre-made, store-bought pizza crust for this recipe. Simply spread the peanut butter and jelly on top of the crust before baking.
Yes, you can add additional toppings such as banana slices, chocolate chips, bacon crumbs or chopped nuts.
Yes, you can make the dough ahead of time and store it in the refrigerator for up to 3 days before shaping and baking it.

Gluten Free Peanut Butter and Jelly Pizza
Equipment
- Mixer with dough hook
- Pizza cutter or sharp knife
- Cooling rack
- timer
Ingredients
- 2 cups warm water
- 2 teaspoons granulated sugar
- 2 ½ teaspoons active dry yeast I use caputo yeast
- 4 cups flour no xanthan gum
- 2 teaspoons salt
- ½ cup peanut butter
- ¼ cup strawberry jam
- 1 tablespoon coarse sugar for sprinkling on crust
- 2 tablespoons avocado oil for brushing unbaked crust
Instructions
- Whisk sugar, warm water together. Add yeast and let bloom for 15 min
- Mix flour and salt together. Add wet ingredients and mix until just combined.
- Cover with warm damp towel and let rise for 1 hour in a warm place.
- Preheat the oven to 450 degrees.
- Punch a fist into dough once it’s risen and divide into 4 sections for mini pizzas or 2 sections for large pizzas.
- Form dough into pizza rounds on a clean floured surface
- Transfer crust to a parchment lined baking sheet.
- Brush crust with avocado oil
- Spread a layer of peanut butter in the center of the unbaked crust, leaving 1 inch on the edges
- Top with dollops of strawberry jam. Use a toothpick to gently swirl with the peanut butter.
- Bake in the oven for 15 minutes and let cool for 10 minute before cutting.


Leave a Reply