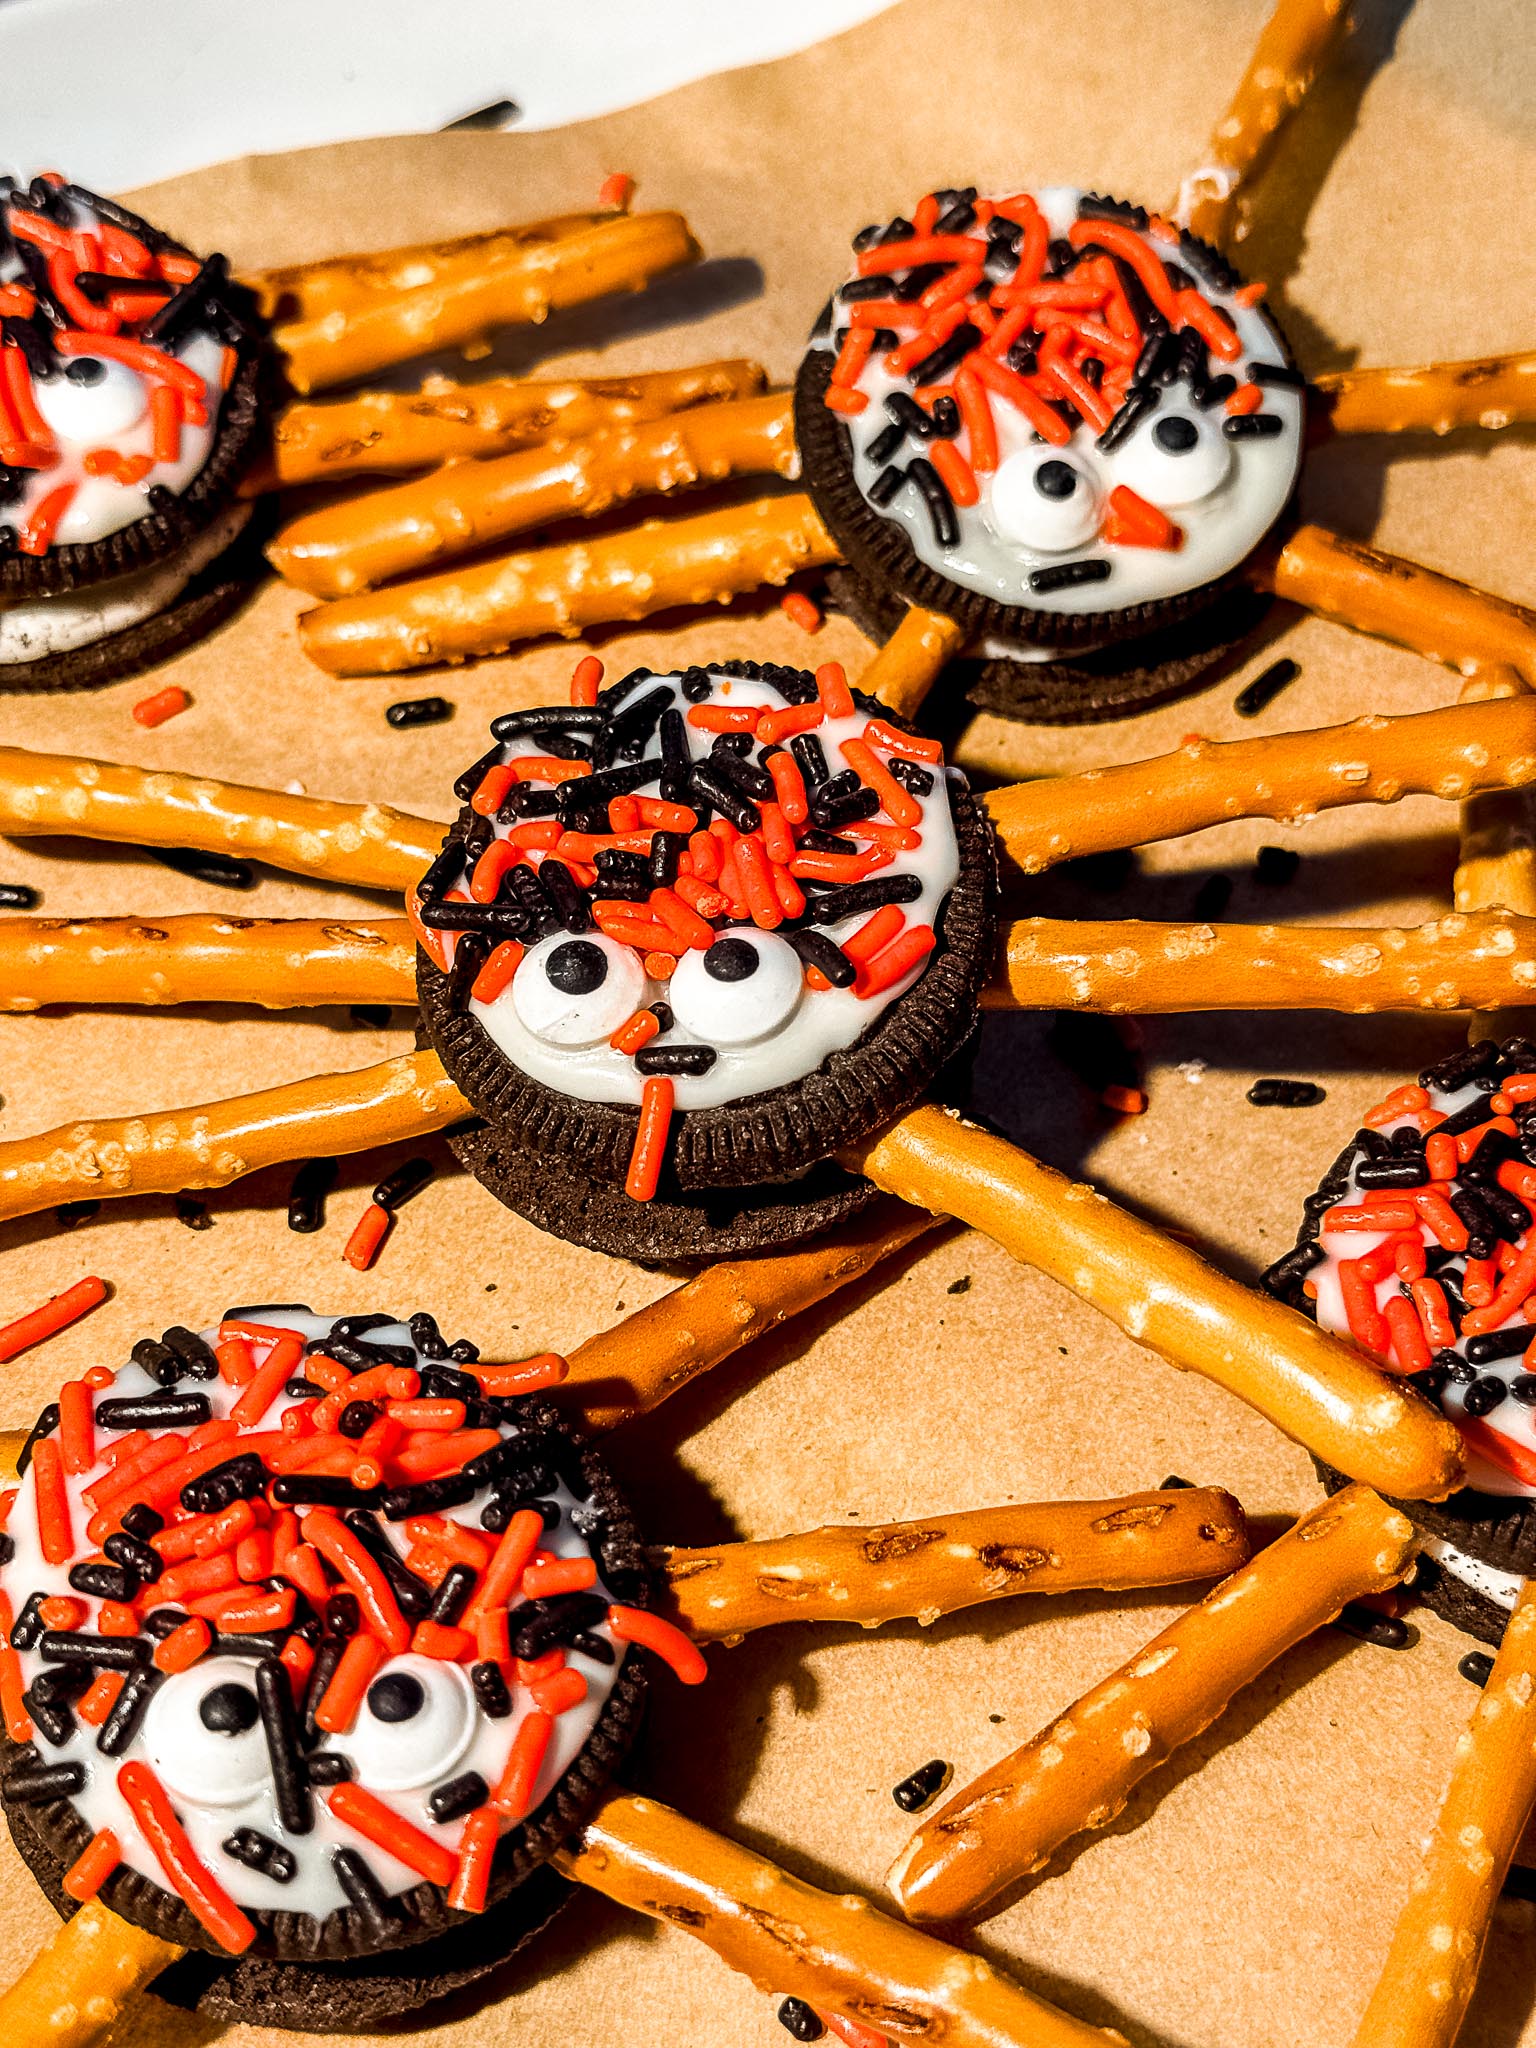
These adorable gluten-free Halloween spider cookies transform ordinary Oreos into spooky treats in under 20 minutes. With just five ingredients and zero baking required, they're the easiest gluten-free Halloween dessert you'll make this season. I've been making these with my family every October for years, and they never fail to steal the show at parties and school celebrations.
The trick that makes these stand out? Using white chocolate as both adhesive and decoration. While most spider cookie tutorials just stack things together (resulting in legs that fall off the moment someone picks them up), melting white chocolate creates a sturdy bond that keeps everything secure. Plus, it gives you the perfect canvas for those googly candy eyes and festive sprinkles. As someone who's been gluten-free for over 10 years and studied nutrition extensively, I've tested countless ways to make allergen-friendly treats hold together, and this white chocolate method wins every time.
These spooky spiders work perfectly alongside my Gluten-Free Chicken Cornbread Casserole for a complete Halloween dinner spread, or serve them after White Bean and Bacon Soup for a cozy fall meal with a sweet finish.

Why This Recipe Works
No-Bake Simplicity: Unlike traditional cookie recipes that require precise measurements and oven timing, these spiders come together with simple assembly. Perfect for kids to help with or when you need a last-minute Halloween contribution.
Allergen-Friendly: Using certified gluten-free Oreos and pretzels means everyone at the party can enjoy them. I always keep King Arthur Gluten Free Measure for Measure Flour stocked for baking projects, but this recipe doesn't even need it.
Customizable: Switch up the chocolate colors, add different sprinkles, or use various candy eye sizes to create a whole spider family with different personalities.
Ingredients
For the Spider Cookies:
- 1 package gluten-free Oreos (about 36 cookies)
- 1 cup gluten-free pretzel sticks
- ½ cup white chocolate chips
- Candy eyes (1 package, approximately 72 eyes for 36 spiders)
- Halloween sprinkles (orange, black, purple, or your choice)
Equipment
Microwave-Safe Bowl: Essential for melting white chocolate in controlled bursts without scorching. I use these Anchor Hocking Glass Mixing Bowls because glass distributes heat evenly and you can see exactly when the chocolate is melted.
Silicone Baking Mat: Provides a non-stick surface for assembling spiders and makes cleanup instant. The chocolate won't stick, and you can reuse it hundreds of times.
Small Spoon or Piping Bag: Allows precise white chocolate placement so your spider legs stay exactly where you want them. A regular teaspoon works fine, but a piping bag gives cleaner lines if you want to get fancy.
Baking Sheet: Holds your finished spiders while the chocolate sets. These Nordic Ware half sheets are perfect because they won't warp and fit easily in most refrigerators.
Instructions
Open the Oreos
Carefully twist apart each gluten-free Oreo and set the tops aside. Work gently so the cream filling stays on one side. You want a clean separation because the filling acts as extra adhesive for your pretzel legs.
Add the Legs
Lay three pretzel sticks on each side of the bottom cookie, for six legs total. Position them so they extend outward like real spider legs, with a slight angle. The pretzels should overlap the cookie edge by about half an inch for the most realistic look.
Glue with White Chocolate
Melt white chocolate chips in the microwave in 15-second bursts, stirring between each interval until completely smooth. This prevents scorching and ensures even melting. Spoon or pipe a small amount of melted white chocolate over the center where the pretzels meet the cookie. This creates the bond that keeps legs secure. Gently press the Oreo top back on, sandwiching the pretzels and white chocolate between both cookie halves.
Decorate the Spiders
Add a bit more melted white chocolate on top of each assembled Oreo, creating a small pool in the center. Press on two candy eyes while the chocolate is still warm and tacky. Immediately sprinkle with Halloween sprinkles before the chocolate begins to set. Work quickly during this step since white chocolate hardens faster than you'd expect.
Let Them Set
Chill in the refrigerator for 10 to 15 minutes, or let sit at room temperature for about 30 minutes until the chocolate fully hardens. The cold setting method is faster, but room temperature prevents any condensation from forming on the chocolate once you remove them.

Recipe Tips
Chocolate Alternatives: Use dark chocolate instead of white for dramatic contrast and a less sweet flavor. Melted orange candy melts drizzled over the finished spiders add extra Halloween color and tie into traditional orange and black themes.
Pretzel Options: Mini pretzel sticks create smaller, more delicate spider legs. Regular full-size pretzels work if that's what you have, just break them to your preferred leg length.
Make-Ahead Instructions: Assemble these spiders up to three days in advance. Store in an airtight container at room temperature with parchment paper between layers to prevent sticking. The white chocolate stays firm and the pretzels maintain their crunch.
Candy Eye Placement: If candy eyes aren't available, use mini chocolate chips pressed into the white chocolate instead. Two chips per spider creates the same effect without requiring a specialty ingredient.

Storage
Store gluten-free Halloween spider cookies in an airtight container at room temperature for up to three days. Layer them with parchment or wax paper to prevent the chocolate from smudging. They hold up well in cool environments but avoid direct sunlight or warm spots where the white chocolate might soften.
These cookies don't freeze well due to the pretzel texture changing, so plan to make them within a few days of when you'll serve them. The good news is they're so quick to assemble that making a fresh batch takes almost no time.
FAQ
Absolutely. If you're not concerned about gluten, regular Oreos work exactly the same way. The assembly process and chocolate bonding technique remain identical regardless of which Oreo variety you choose.
White chocolate melting wafers or almond bark work perfectly. You can also use milk chocolate or dark chocolate chips if you prefer. The flavor changes slightly, but the structural integrity stays the same since any melted chocolate creates that essential adhesive bond.
Choose thicker pretzel sticks rather than ultra-thin ones, and handle them gently when positioning. If a pretzel breaks, simply replace it with a new one before adding the white chocolate. The chocolate actually reinforces the pretzels once it sets, making the finished product sturdier than the individual components.
No, room temperature storage is fine. Refrigeration can cause condensation when you bring them back to room temperature, potentially making the chocolate look cloudy. Store them in a cool, dry spot and they'll maintain their appearance and texture perfectly.

Gluten-Free Halloween Spider Cookies
Equipment
- Microwave-safe bowl
- Silicone baking mat
- Small spoon or piping bag
Ingredients
- 1 package gluten-free Oreos about 36 cookies
- 1 cup gluten-free pretzel sticks
- ½ cup white chocolate chips
- 72 candy eyes approximately 1 package
- Halloween sprinkles orange, black, purple, or your choice
Instructions
- Open the Oreos: Carefully twist apart each gluten-free Oreo and set the tops aside. Work gently so the cream filling stays on one side.
- Add the Legs: Lay three pretzel sticks on each side of the bottom cookie, for six legs total. Position them so they extend outward like real spider legs, with a slight angle.
- Glue with White Chocolate: Melt white chocolate chips in the microwave in 15-second bursts, stirring between each interval until completely smooth. Spoon or pipe a small amount of melted white chocolate over the center where the pretzels meet the cookie. Gently press the Oreo top back on, sandwiching the pretzels and white chocolate between both cookie halves.
- Decorate the Spiders: Add a bit more melted white chocolate on top of each assembled Oreo, creating a small pool in the center. Press on two candy eyes while the chocolate is still warm and tacky. Immediately sprinkle with Halloween sprinkles before the chocolate begins to set.
- Let Them Set: Chill in the refrigerator for 10 to 15 minutes, or let sit at room temperature for about 30 minutes until the chocolate fully hardens.
Notes
Pretzel Options: Mini pretzel sticks create smaller, more delicate spider legs. Regular full-size pretzels work if that's what you have, just break them to your preferred leg length.
Make-Ahead Instructions: Assemble these spiders up to three days in advance. Store in an airtight container at room temperature with parchment paper between layers to prevent sticking.
Candy Eye Placement: If candy eyes aren't available, use mini chocolate chips pressed into the white chocolate instead.