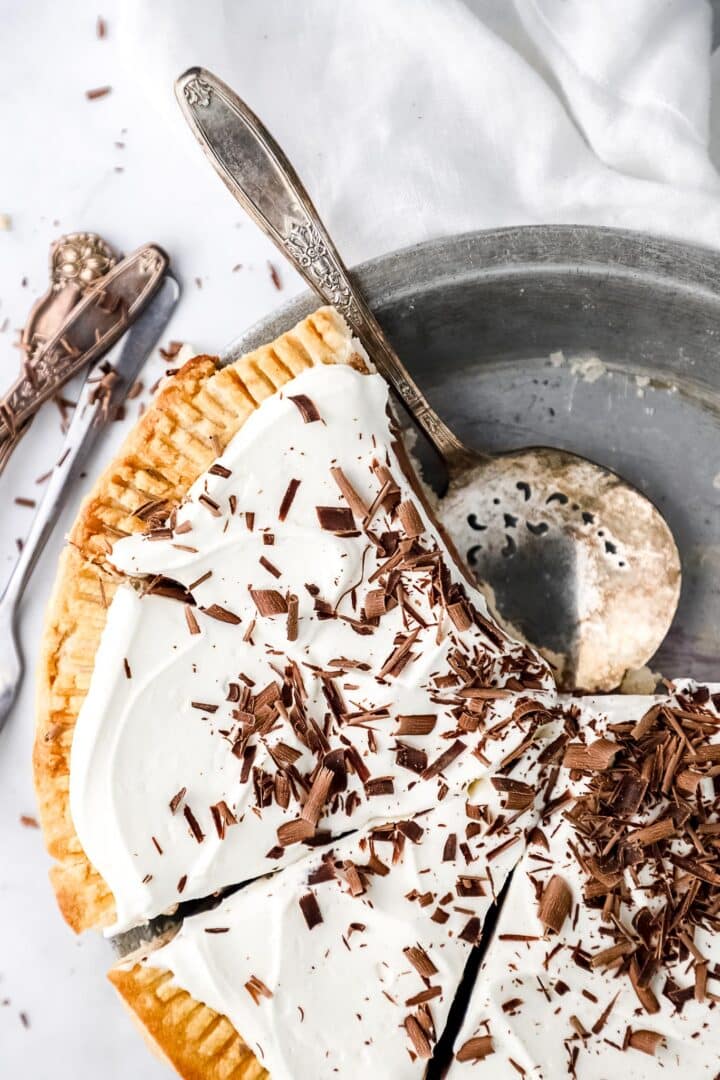
Indulge in the silky, sumptuous layers of our Gluten-Free French Silk Pie, a dessert that combines the luxuriousness of dark chocolate with the light, airy texture of whipped cream, all nestled in a flaky, buttery crust. This version is specially crafted for those who cherish the rich flavors but prefer a recipe without the worry of raw eggs.
Dive into the world of gluten-free desserts with our Easy Gluten-Free Crème Brûlée and discover the science behind gluten-free baking here.

Why You'll Love This Recipe
This Gluten-Free French Silk Pie is not just a dessert; it's an experience. Here's why you will fall in love with it:
- Rich and Luxurious: High-quality gluten-free dark chocolate is the star, offering depth and richness.
- Safe and Eggcellent: We've adapted the classic by gently cooking the eggs, ensuring the pie is safe for everyone without compromising the texture.
- Gluten-Free Joy: From the silky filling to the flaky crust, every bite is gluten-free, making it a worry-free indulgence.
- No Raw Eggs: This recipe provides a delightful twist to the traditional French silk pie, ensuring everyone can enjoy it without concern.
Key Ingredients and Their Roles
- High-Quality Gluten-Free Dark Chocolate: The cornerstone of this pie, providing a deep, rich flavor and silky texture.
- Heavy Cream: Whipped into stiff peaks, it adds lightness and volume to the dense chocolate, creating a luscious filling.
- Granulated Sugar: Balances the bitterness of the chocolate, adding just the right amount of sweetness.
- Unsalted Butter: Adds creaminess and a smooth, melt-in-your-mouth texture to the filling.
- Eggs: Gently cooked to be safe to eat, they help thicken the filling, contributing to its velvety consistency.
- Pure Vanilla Extract and Salt: These enhance the flavors, adding depth and contrast to the sweet, chocolaty filling.
Gluten-Free Pie Crust
Don't forget the base! Follow this gluten-free pie crust recipe to complete your pie. It's the perfect foundation for the creamy filling.
Step-by-Step Instructions
- Melt Chocolate: Start by melting your chocolate until smooth, then let it cool slightly. This ensures a smooth integration into the egg mixture without cooking the eggs.
- Prepare and Cook Egg Mixture: Whisk eggs, sugar, and salt, then gently cook over simmering water until warm and slightly thickened. This step is crucial for safety and texture.
- Combine Chocolate and Egg Mixture: Mix the melted chocolate into your egg mixture until perfectly smooth.
- Add Butter: Incorporate softened butter bit by bit, achieving a glossy, smooth filling.
- Whip Cream: Beat heavy cream to stiff peaks, then fold into your chocolate mixture, introducing air and lightness.
- Chill: Pour into a pre-baked gluten-free pie crust and refrigerate until firm.
- Serve: Garnish with whipped cream or chocolate shavings for an extra touch of elegance.

Serving Suggestions
Serve this pie with a dollop of whipped cream or a sprinkling of chocolate shavings. Pair it with a hot cup of espresso or a glass of red wine to enhance the chocolate flavor.
FAQs
French silk pie is denser with a smoother, buttery texture, while chocolate mousse pie is lighter and airier.
The magic lies in high-quality dark chocolate, heavy cream, sugar, butter, eggs, vanilla, and a pinch of salt.
Consume within 3-4 days. Store in the refrigerator to maintain its perfect texture and flavor.

Gluten-Free French Silk Pie (No Raw Eggs)
Equipment
Ingredients
For the Filling:
- 1 cup heavy cream
- 8 ounces high-quality gluten-free dark chocolate finely chopped
- ¾ cup granulated sugar
- ½ cup unsalted butter softened
- 2 large eggs
- 2 teaspoons pure vanilla extract
- ¼ teaspoon salt
For the Crust:
- 2 ½ cups gluten-free flour
- 1 teaspoon pink Himalayan salt
- 2 sticks cold butter cubed
- ½ cup cold vodka
Instructions
The Crust
- Combine Dry Ingredients and Butter: Start by adding the gluten-free flour and pink Himalayan salt to your food processor. Add ¼ of your cubed cold butter and pulse until the mixture resembles coarse crumbs.
- Incorporate Remaining Butter: Gradually add in the remaining butter, pulsing after each addition, until the mixture is well combined and starts to come together.
- Add Cold Vodka: With the processor running, slowly drizzle in cold vodka one tablespoon at a time. Continue until the dough just begins to form a ball. Be careful not to overdo it; as soon as it forms a ball, stop adding vodka.
- Form the Dough: Remove the dough from the processor and gently pat it into a single disk on a floured surface. This helps in rolling it out evenly later.
- Chill the Dough: Wrap your dough disk tightly in plastic wrap and refrigerate. This step is crucial as it allows the dough to rest and the butter to firm up, making the crust flakier.
- Roll Out the Dough: After chilling for at least two hours, take the dough out and let it sit for a few minutes to slightly soften, making it easier to roll. On a floured surface, roll the dough into a circle large enough to fit your 9-inch pie pan.
- Line the Pie Pan: Carefully transfer the rolled-out dough into your pie pan. Gently press it into the pan, making sure it's snug against the sides and bottom. Trim any excess dough from the edges.
- Pre-Bake the Crust: Pre-baking (or blind baking) the crust is essential for recipes with wet fillings like French silk pie. This step ensures your crust is perfectly cooked and not soggy. Use pie weights or dried beans to keep the crust from puffing up in the oven.
- Cool Before Filling: Once pre-baked, allow your crust to cool completely. This creates the perfect foundation for the creamy, decadent French silk filling to come.
The Filling
- Melt the Chocolate: In a heatproof bowl, gently melt the chocolate using a double boiler method or microwave in short bursts, stirring until smooth. Let cool slightly.
- Prepare Egg Mixture: In a medium heatproof bowl, whisk together eggs, granulated sugar, and salt.
- Cook Egg Mixture: Place the bowl over a pot of simmering water (double boiler), ensuring the bottom of the bowl doesn’t touch the water. Whisk constantly for 3-4 minutes, or until the mixture is warm to the touch and slightly thickened.
- Combine Chocolate and Egg Mixture: Remove the bowl from heat and whisk in the melted chocolate until smooth.
- Incorporate Butter: Add the softened butter in small pieces, whisking after each addition until the mixture is smooth and glossy.
- Whip the Cream: In a separate bowl, whip the heavy cream until stiff peaks form.
- Fold in Whipped Cream: Gently fold the whipped cream into the chocolate mixture until fully incorporated and no streaks remain.
- Fill the Pie: Pour the filling into the prepared and cooled gluten-free pie crust, smoothing the top with a spatula.
- Chill: Refrigerate the pie for at least 4 hours, or overnight, until the filling is firm and set.
- Garnish and Serve: Before serving, garnish with additional whipped cream or chocolate shavings if desired.
Notes
Chill Thoroughly: The pie needs to be well-chilled to set properly, so don't rush this step.


