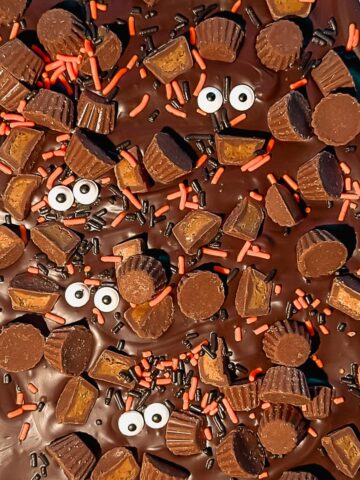
These gluten-free peanut butter spider cookies are the Halloween cookies I make every single year without fail. They're naturally flourless, so there's zero worry about cross-contamination or finding the right gluten-free flour blend. Just five pantry ingredients, mini Reese's cups, and a little Nutella magic transform simple peanut butter cookies into the cutest (and tastiest) spiders you've ever seen.
Also known as gluten-free peanut butter blossom spiders or Reese's cup spider cookies, these easy Halloween cookies are naturally flourless. If you're building a full Halloween dessert spread, pair these with my gluten-free pretzel mummies, Nutella mummies (made with GF puff pastry), or gluten-free Halloween spider cookies with Oreo and pretzel legs for even more spooky variety.
I've been gluten-free for over 10 years, and as a future Registered Dietitian, I've learned that the best gluten-free recipes aren't just adaptations. They're recipes that work perfectly without flour from the start. That's exactly what makes these spider cookies so reliable. No gluten-free flour means no gritty texture, no weird aftertaste, and no failed batches. Just soft, chewy peanut butter cookies that happen to be naturally gluten-free.
✅ Tested Tip: Here's the trick that makes these cookies better than any other spider cookie recipe out there: press the mini Reese's cup into the cookie immediately when it comes out of the oven, while it's still warm and soft. The heat slightly melts the chocolate cup, creating a seal that keeps it perfectly centered and prevents it from sliding off later. Most recipes tell you to let cookies cool first, but that's when things get messy. Trust me on this one. It's a small step that makes all the difference.

Best Gluten-Free Halloween Cookies (Why They Work)
This recipe delivers exactly what you want for Halloween: adorable presentation with minimal effort. The flourless base comes together in one bowl with no mixer required. You can whip up a batch in under 30 minutes from start to finish, making these perfect for last-minute Halloween parties, school treats, or a fun weekend activity with kids.
The naturally gluten-free aspect means everyone at your Halloween gathering can enjoy them safely. No separate batch required, no explaining ingredients, no stress. These cookies are soft and chewy with that classic peanut butter cookie texture you remember. The mini Reese's cups add chocolate-peanut butter heaven in every bite, while the Nutella legs and candy eyes make them Instagram-worthy without requiring any artistic talent.
They're also incredibly forgiving. Unlike some gluten-free recipes that demand precise measurements and specific brands, these flourless peanut butter cookies work beautifully every single time. The dough is easy to handle, doesn't spread too much, and bakes evenly. If you can roll a ball of dough, you can make these Reese's cup spider cookies. These are hands-down some of the best gluten-free Halloween cookies for busy bakers who want adorable results without stress.
If you're planning a full Halloween dessert spread, pair these with other easy Halloween treats for variety. These spider cookies are the perfect centerpiece for any kid-friendly Halloween party.
Ingredient Notes
Peanut Butter: Use creamy, not natural. Natural peanut butter has too much oil separation and will make your cookies greasy and flat. Stick with standard creamy peanut butter like Jif or Skippy. Just double-check the label to confirm it's gluten-free (most major brands are, but it never hurts to verify). For more gluten-free baking tips, check out my Easy Gluten-Free Egg Bites recipe where I share similar pantry staple strategies.
Sugar: Regular granulated sugar works perfectly here. It provides structure and that slight crackle on top that makes peanut butter cookies so appealing. I don't recommend substituting with coconut sugar or other alternatives, as they'll change the texture significantly.
Egg: One large egg binds everything together. Make sure it's at room temperature for the smoothest dough. This is similar to the technique I use in my Gluten-Free Salmon Patties Recipe, where room temperature eggs create better binding.
Vanilla Extract: Pure vanilla adds warmth and depth. Don't skip it.
Mini Reese's Cups: The stars of the show. You'll need 12 for a standard batch. I like to chill them in the fridge for 15 minutes before assembling so they hold their shape better when pressed into warm cookies. Unwrap them ahead of time to make assembly easier.
Nutella: This is what you'll pipe to create spider legs. The consistency is perfect for piping and it firms up nicely at room temperature. You can substitute with melted chocolate if you prefer, but Nutella is easier to work with and adds extra flavor.
Candy Eyes: Find these in the baking aisle near Halloween. You'll need 24 eyes total (2 per spider). They stick right onto the Nutella without any additional adhesive needed.
If you love working with simple ingredient lists like this, you'll also enjoy my Gluten-Free Chicken Cornbread Casserole which uses pantry staples to create maximum flavor.
Equipment
Baking Sheet: A standard half-sheet pan works perfectly. I recommend using a light-colored aluminum sheet pan like this Nordic Ware half sheet because dark pans can cause the bottoms to over-brown before the centers set.
Parchment Paper or Silicone Baking Mat: Essential for preventing sticking and ensuring easy cleanup. I use these Amazon Basics silicone baking mats for every batch and they've lasted me years.
Mixing Bowl: One medium bowl is all you need since everything mixes together easily. I like using glass mixing bowls because you can see the dough consistency clearly.
Piping Bag or Ziplock Bag: For piping the Nutella spider legs. A small ziplock bag with the corner snipped off works just as well as a fancy piping bag. No special tips needed.
Offset Spatula (Optional): Helpful for smoothing out Nutella legs if you want them perfectly neat, but totally optional. Most of the time I just pipe and go.
Shop more of my favorite baking tools here.
How to Make Gluten-Free Peanut Butter Spider Cookies
Step 1: Preheat and Prep Preheat your oven to 350°F and line your baking sheet with parchment paper or a silicone mat. Unwrap all your mini Reese's cups now so they're ready to go the second your cookies come out of the oven. This is the trick I mentioned earlier. Timing matters.
Step 2: Mix the Dough In a medium bowl, combine 1 cup creamy peanut butter, ¾ cup granulated sugar, 1 large egg, and 1 teaspoon vanilla extract. Stir with a wooden spoon or spatula until the mixture is completely smooth and uniform. It should look thick and slightly glossy. No flour means no overmixing concerns. You literally cannot mess this up.
Step 3: Shape the Cookies Roll the dough into 1-inch balls (about 1 tablespoon of dough each). You should get 12 cookies from this batch. Place them on your prepared baking sheet about 2 inches apart. They will spread slightly, but not dramatically. Don't flatten them or press with a fork like traditional peanut butter cookies. We want them round so the Reese's cup sits nicely on top.
Step 4: Bake Bake for 9 to 10 minutes. The edges should look set and slightly golden, but the centers will still appear soft and underbaked. That's exactly what you want. They'll firm up as they cool, and pulling them early ensures that perfect chewy texture. If you overbake, they'll be dry and crumbly.
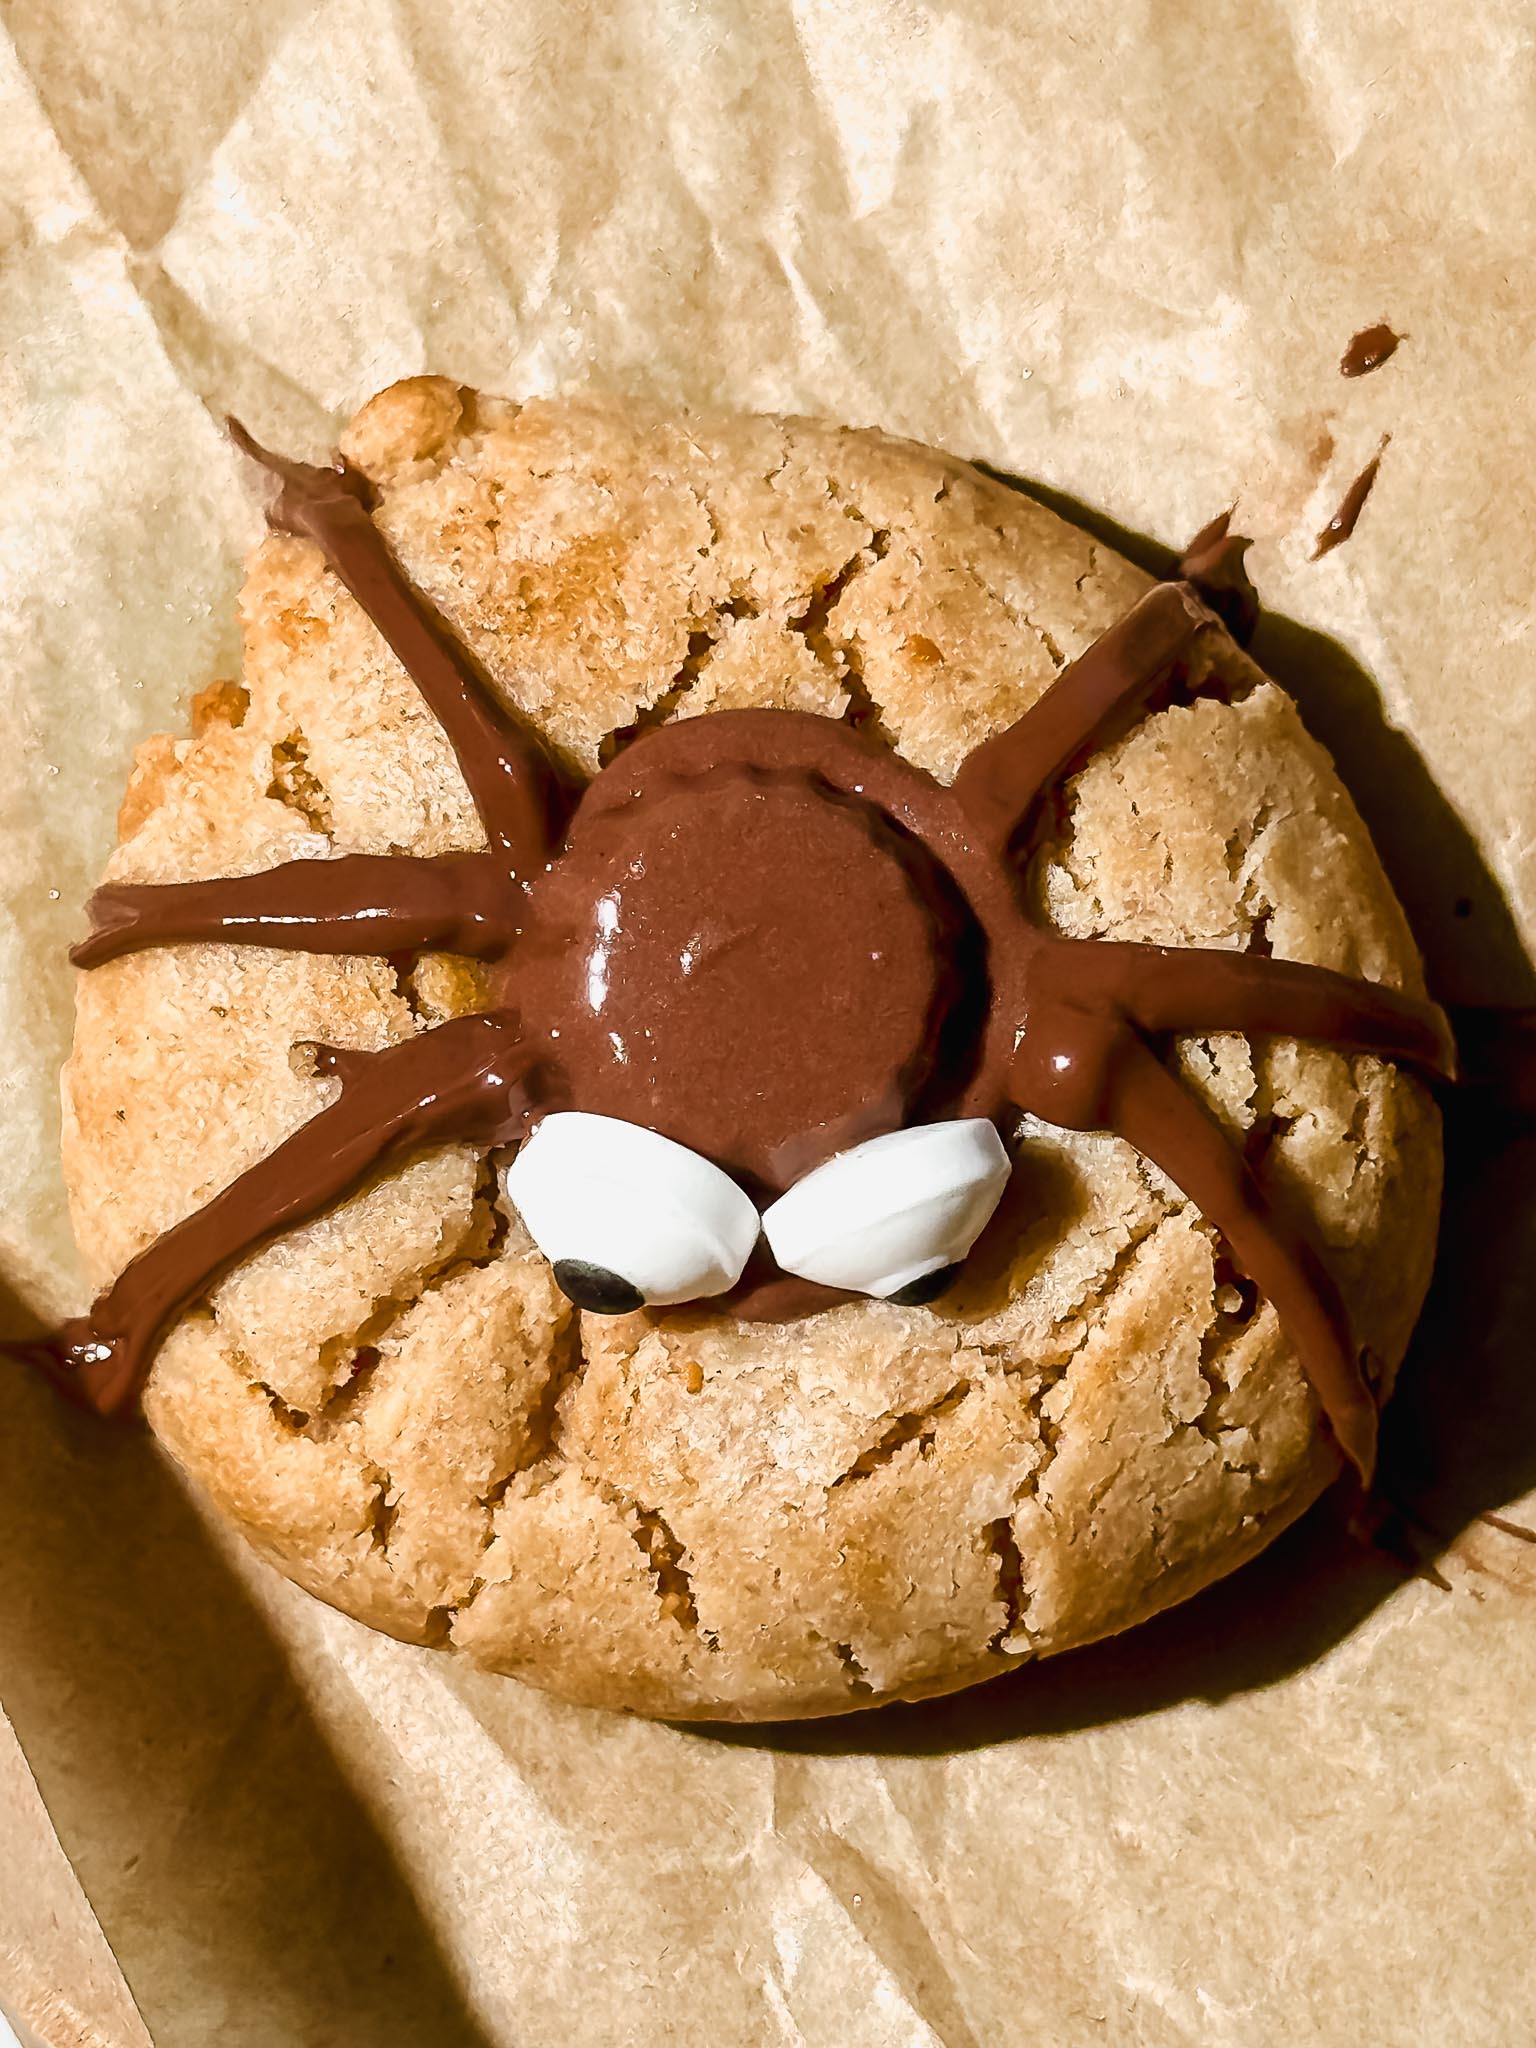
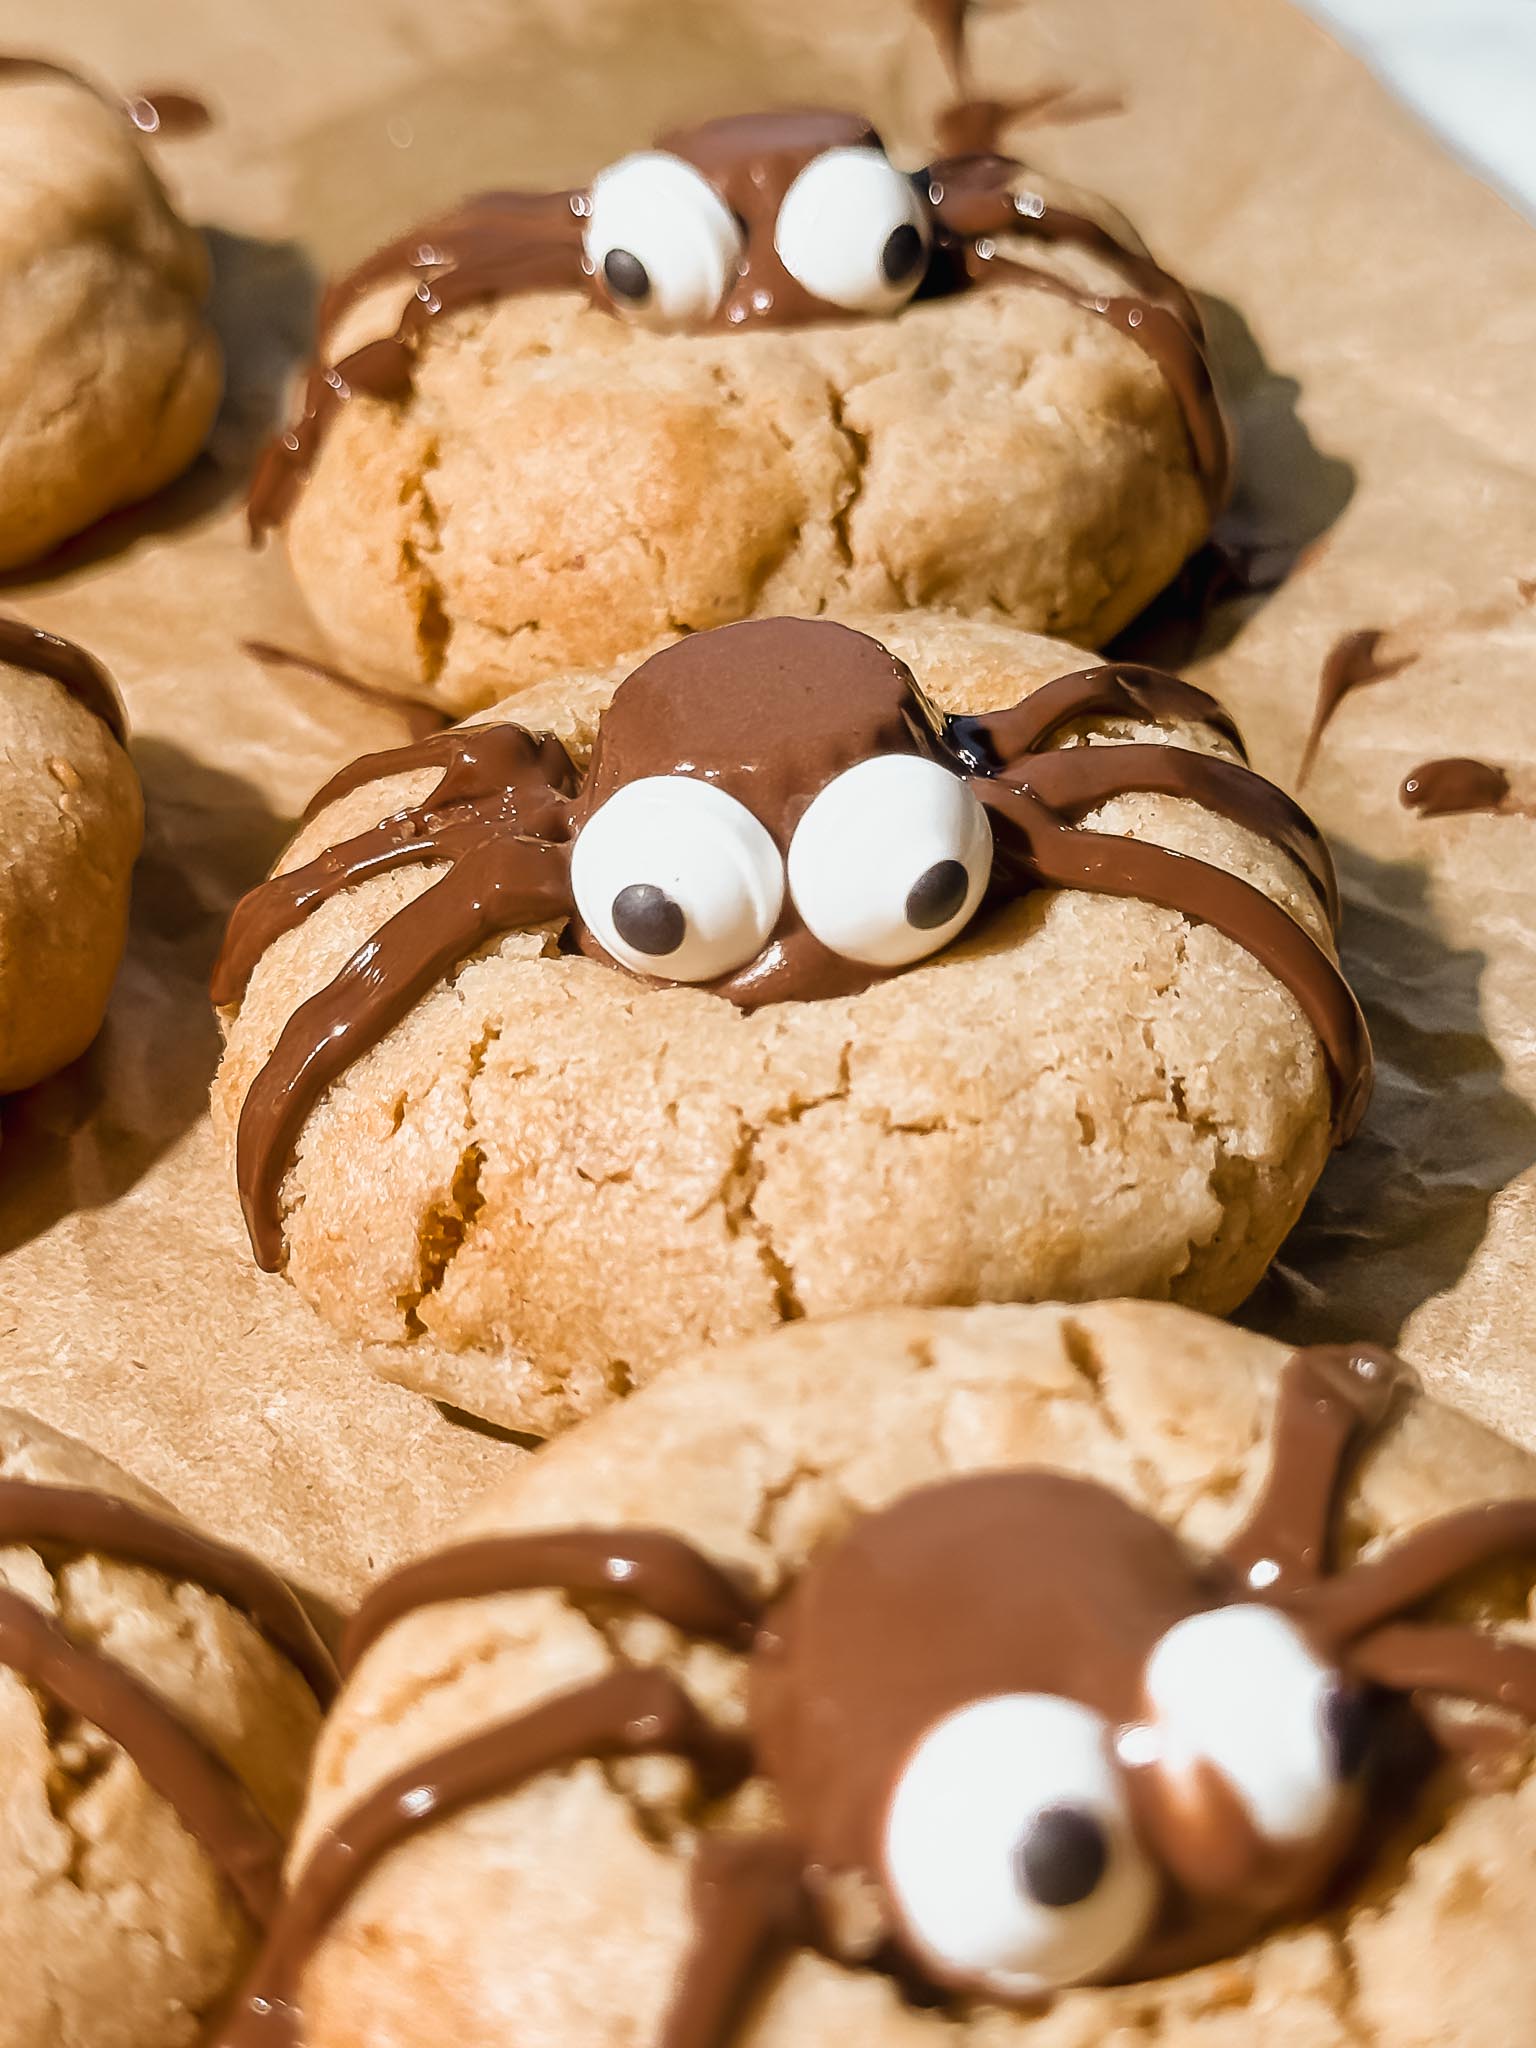
Step 5: Add the Reese's Cups (The Key Step) The moment you pull the baking sheet from the oven, immediately press one mini Reese's cup into the center of each cookie. Press gently but firmly so it sinks in slightly. The warmth of the cookie will slightly soften the chocolate cup and create that perfect seal I mentioned. Don't wait. Don't let them cool first. Do this immediately.
Let the cookies cool completely on the baking sheet. This takes about 15 to 20 minutes. Don't try to move them while warm or they'll break.
Step 6: Decorate with Spider Legs and Eyes Spoon about ¼ cup Nutella into a piping bag or small ziplock bag. Snip off a tiny corner (start small; you can always cut more if needed). Pipe 8 legs total (4 on each side of the Reese's cup), angling them outward from the body. They don't need to be perfect. Wobbly spider legs look more realistic and charming anyway.
Add a small dab of Nutella on top of the Reese's cup and gently press two candy eyes into it. The Nutella acts as edible glue.
Step 7: Let Them Set Allow the Nutella to firm up for 15 to 20 minutes at room temperature before serving. If you're in a hurry, pop them in the fridge for 10 minutes. The Nutella will set up nicely and hold everything in place.
These cookies are incredibly versatile for different occasions too. During the holidays, I make a similar version with chocolate kisses instead of Reese's cups. If you're looking for more easy recipes to serve at gatherings, try my Easy Open-Faced Chicken Sandwich Recipe, which is another crowd-pleaser that comes together quickly.

Expert Tips for Perfect Spider Cookies
Chill Your Reese's Cups: Store the unwrapped mini Reese's cups in the fridge for 15 minutes before you start baking. Cold chocolate holds its shape better when pressed into warm cookies and won't melt as quickly.
Don't Skip the Immediate Press: Seriously, this is the make-or-break moment. Press those Reese's cups into the cookies the second they come out of the oven. If you wait until they cool, the cookies will crack when you try to press, and the cups won't stick properly.
Use a Small Piping Tip: When snipping your piping bag or ziplock, start with a tiny cut. You can always make it bigger, but if you cut too large initially, your spider legs will be thick and blobby instead of delicate and spidery.
If Your Kitchen Is Warm: Pipe chocolate legs instead of Nutella for faster set. Melt ½ cup chocolate chips with 1 teaspoon coconut oil, let cool slightly, then pipe. It firms up much quicker in warm environments.
Store Properly: Keep these in an airtight container at room temperature for up to 3 days. The Nutella stays soft enough that they're easy to bite into, but firm enough that the decorations won't smudge. Don't refrigerate them unless absolutely necessary (like if your house is very warm), because cold cookies lose that perfect chewy texture.
Double the Batch: This recipe makes 12 cookies, which disappears fast at any Halloween party. I usually double the batch because they're so easy to make and everyone always wants seconds. Plus, they make fantastic gifts when wrapped up in clear bags tied with orange and black ribbon.
Make Them Ahead: You can bake the base cookies up to 2 days in advance and store them in an airtight container. Add the Reese's cups, Nutella legs, and candy eyes the day you plan to serve them for the freshest presentation.
Storage and Make-Ahead Instructions
Store these gluten-free peanut butter spider cookies in an airtight container at room temperature for up to 3 days. Layer them gently with parchment paper between layers if you're stacking to prevent the spider legs from getting squished.
If you want to make components ahead, bake the plain peanut butter cookies up to 2 days in advance and store them unfrosted in a container. The day you need them, warm them slightly in a 300°F oven for 3 to 4 minutes, then press in the Reese's cups and decorate while warm. This gives you the convenience of advance prep with the fresh-baked appeal everyone loves.
You can also freeze the base cookies (without decorations) for up to 3 months. Freeze them in a single layer on a baking sheet until solid, then transfer to a freezer bag. Thaw at room temperature, warm briefly in the oven, and decorate as directed.
For more make-ahead meal ideas that work for busy schedules, check out my White Bean and Bacon Soup, which is another recipe you can prep in advance and enjoy all week.
Variations and Substitutions
Nut-Free Version: Swap the peanut butter for sunflower seed butter to make these allergy-friendly. The texture and flavor will be slightly different (more savory, less sweet), but they'll still work beautifully. Use regular chocolate kisses instead of Reese's cups for a completely nut-free version.
Different Candies: Try regular Hershey's Kisses, dark chocolate kisses, or even caramel-filled kisses for variety. Rolos also work wonderfully and add a fun caramel surprise inside.
Chocolate Spider Legs: If you don't have Nutella on hand, melt ½ cup chocolate chips with 1 teaspoon coconut oil and use that for piping. It will firm up faster than Nutella, so work quickly.
Add a Crunch: Roll the dough balls in granulated sugar or coarse sugar before baking for extra sparkle and a slight crunch on the outside. This is especially pretty if you're serving these at a party.
Different Sizes: Make mini versions using a half tablespoon of dough and Hershey's Kisses instead of Reese's cups. They're bite-sized and perfect for parties where people want to try multiple treats.
Why These Are Better Than Traditional Spider Cookies
Most spider cookie recipes start with a traditional peanut butter cookie dough that requires flour, making them more complicated for gluten-free bakers. You have to find the right gluten-free flour blend (which can be expensive and inconsistent), worry about cross-contamination, and deal with the gritty texture that some gluten-free flours create.
These flourless peanut butter spider cookies skip all of that. They're naturally gluten-free, which means they're safe for anyone with celiac disease or gluten sensitivity without any modifications. The texture is softer and chewier than flour-based versions because peanut butter creates this incredible tender crumb all on its own.
They're also faster and easier. One bowl, four ingredients for the cookie base, no chilling time required, and minimal cleanup. Traditional recipes often require you to cream butter and sugar, add flour gradually, chill the dough, and then bake. This recipe? Mix, scoop, bake, decorate. Done in 30 minutes flat.
And honestly? They taste better. That pure peanut butter flavor shines through without being muted by flour. The texture is more like a peanut butter cup filling than a standard cookie, which pairs perfectly with the mini Reese's cup on top. These are hands-down some of the best gluten-free Halloween cookies for busy bakers who want maximum impact with minimum effort.
Serving Suggestions
These gluten-free peanut butter spider cookies are perfect for Halloween parties, school treats (just verify your school's nut policy first), or any fall gathering. Arrange them on a black or orange platter for maximum spooky effect.
Pair them with other Halloween treats like my Easy Chocolate Dipped Watermelon Bites for a fun contrast of flavors and textures. For a complete Halloween party spread, serve alongside Gluten-Free Sweetgreen Harvest Bowl Recipe for something savory to balance the sweet treats.
They also make fantastic edible gifts. Package them in clear cellophane bags tied with ribbon, or arrange them in a decorative box. Everyone loves receiving homemade cookies, especially when they look this cute.
For a fun activity with kids, set up a cookie decorating station. Bake the base cookies ahead of time, then let kids pipe their own spider legs and add the eyes. It's messy, hilarious, and creates memories (plus keeps them entertained for a solid 30 minutes). These easy Halloween spider cookies are perfect for letting kids get creative.
Frequently Asked Questions
Yes, these are naturally gluten-free because they're flourless. The base is made with only peanut butter, sugar, egg, and vanilla extract, so there's no wheat flour or gluten-containing ingredients. They're safe for anyone with celiac disease or gluten sensitivity.
They soften slightly but don't fully melt if you follow my method. Chill the unwrapped Reese's cups in the fridge for 15 minutes first, then press them into the cookies immediately when they come out of the oven. The slight softening actually helps them stick better without falling off.
Yes, but only freeze the base cookies without decorations. Freeze them for up to 3 months, then thaw, warm briefly in a 300°F oven, and decorate the day you plan to serve them. The Nutella legs and candy eyes don't freeze well.
The edges should look set and slightly golden, but the centers will still appear soft. They'll firm up as they cool. Don't wait for the centers to look completely baked or they'll be overdone.
Pipe 8 lines total (4 on each side) with Nutella or melted chocolate. Start at the Reese's cup and angle outward. Chill for 10 minutes to set if needed.
More Gluten-Free Recipes You'll Love
If you're looking for more gluten-free comfort food that actually tastes amazing, try my Gluten-Free Pasta Meat Sauce Recipe, which is hearty, satisfying, and perfect for meal prep. For lighter options, my Cucumber Chicken Salad Recipe is refreshing and packed with protein.
During the holidays, my Prosciutto Wrapped Asparagus is always a hit at parties, and my Crispy Ground Beef Tacos Recipe is a weeknight dinner staple that happens to be naturally gluten-free when you use corn tortillas.
For more sweet treats throughout the year, these flourless peanut butter cookies are the foundation for endless variations. After Halloween, you can top them with regular Hershey's Kisses for everyday enjoyment.
Once the season winds down, balance out the sweet treats with my Creamy Lentil Tomato Soup Recipe for something warm and cozy to enjoy on chilly fall evenings.

Gluten-Free Peanut Butter Spider Cookies
Equipment
- Half-sheet baking pan
- Silicone baking mat or parchment paper
- Mixing Bowl
- Piping bag or ziplock bag
- Offset spatula (optional)
Ingredients
- 1 cup creamy peanut butter ensure gluten-free
- ¾ cup granulated sugar
- 1 large egg
- 1 teaspoon vanilla extract
- 12 mini Reese's peanut butter cups unwrapped
- ¼ cup Nutella for piping
- 24 candy eyes
Instructions
- Preheat Oven: Preheat oven to 350°F (175°C) and line a baking sheet with parchment paper or a silicone mat.
- Make the Dough: In a medium bowl, mix peanut butter, sugar, egg, and vanilla extract until smooth and completely combined.
- Shape Cookies: Roll dough into 1-inch balls (about 1 tablespoon each). Place on prepared baking sheet about 2 inches apart. You should get 12 cookies.
- Bake: Bake for 9 to 10 minutes, or until edges are set but centers still appear soft.
- Add Reese's Cups: Immediately press one mini Reese's cup into the center of each warm cookie. Let cool completely on the baking sheet (about 15 to 20 minutes).
- Decorate: Spoon Nutella into a piping bag or ziplock bag with the corner snipped. Pipe 8 legs total (4 on each side of the Reese's cup), angling outward. Add a small dab of Nutella on top of the cup and press two candy eyes into it.
- Set and Serve: Let the Nutella firm up for 15 to 20 minutes at room temperature before serving.
Notes
Chill unwrapped Reese's cups in the fridge for 15 minutes before assembly so they hold their shape better.
Start with a tiny cut when snipping your piping bag. You can always make it bigger for thicker legs.
Store in an airtight container at room temperature for up to 3 days.
Double the batch for parties. These disappear fast.