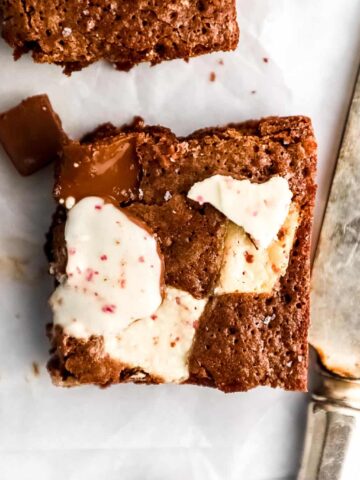
If you're a fan of traditional blondies, you'll love these gluten free blondies! These blondies are gooey and rich, with a hint of chocolate from the vegan chocolate chips and a touch of hazelnut from the Nutella.
Tried this recipe? Please leave a star ⭐️⭐️⭐️⭐️⭐️ rating below and/or a review in the comments section down the page. You can also stay in touch with me through social media by following me on Instagram, Pinterest, and TikTok or by subscribing to my newsletter.
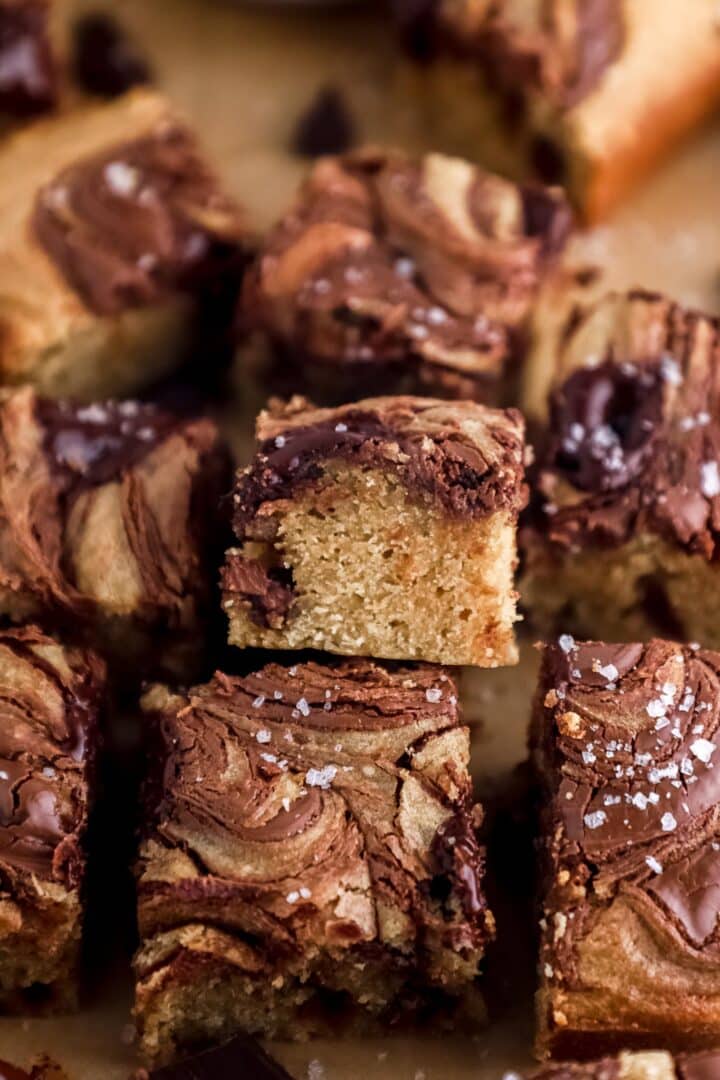
This gluten free blondies recipe is a perfect dessert for any occasion, and they're sure to be a hit with both gluten-free and non-gluten-free eaters alike. They're like fudgy brownies, except better. Seriously! Think of them as a better version of brownies. Serve them warm, with a scoop of vanilla ice cream on top of the cookie bar for an extra special treat.
If you're looking for more gluten free bar cookies like this blondie recipe, check out my gluten free andes mint crumbl cookie recipe, my gluten free peanut butter chocolate bars recipe, and my nutella frozen chocolate covered raspberries.
Reasons to Make these Gluten Free Blondies
There are several reasons why you might want to consider making this recipe for gluten-free blondies:
- They're easy to make: With just a few simple ingredients and minimal prep work, these blondies come together quickly and easily.
- They're delicious: Gooey, rich, and bursting with chocolate and hazelnut flavor, these blondies are sure to satisfy your sweet tooth.
- They're gluten-free: If you're following a gluten-free diet or cooking for someone who is, these blondies are a great option. They use a combination of gluten-free flour and baking powder to achieve the perfect texture. The gluten free flour blend makes these blondies gluten free. Keep scrolling to learn more about the best flours for easy gluten free baking.
- They're customizable: Feel free to get creative with the add-ins for these blondies. Swap in your favorite chocolate chips or try using a different type of nut butter in place of the Nutella.
- They're perfect for any occasion: Whether you're looking for a sweet treat to serve at a party or just want something to enjoy with your afternoon coffee, these blondies are a great choice.
How are Blondies and Brownies Different?
Blondies and brownies are similar in many ways, but there are a few key differences between the two:
- Ingredients: While both blondies and brownies contain flour, sugar, eggs, and butter, blondies are typically made with light brown sugar rather than cocoa powder, which gives them a lighter color and a slightly different flavor.
- Texture: Blondies tend to be a little denser and chewier than brownies, which are often more fudgy and moist.
- Add-ins: While brownies are often studded with chocolate chips or chunks, blondies can be made with a variety of add-ins, such as nuts, white chocolate chips, or even dried fruit.
- Occasions: Brownies are a classic dessert that is popular at parties, potlucks, and other gatherings, while blondies are often enjoyed as an everyday treat.
The Secret to Fudgy Gluten-Free Vegan Blondies
Achieving that perfect fudgy texture in gluten-free desserts can be challenging. The key lies in the precise balance of ingredients. Our recipe uses vegan butter and flax eggs, ensuring these blondies remain moist and flavorful, rivaling any traditional chocolate dessert. Here, we dive into the role of each component, explaining how they contribute to the coveted soft and chewy texture, making these treats a favorite in gluten-free baking.
Key Ingredients Needed
- Butter: The melted butter in this recipe helps to give the blondies their rich, gooey texture. It also adds flavor and helps to bind the other ingredients together.
- Light brown sugar: The light brown sugar in this recipe helps to give the blondies their characteristic soft and chewy texture. It also contributes a slightly caramel-like flavor.
- Granulated sugar: The granulated sugar in this recipe adds sweetness to the blondies and helps to create a slightly crunchy top.
- Eggs: The eggs in this recipe help to bind the ingredients together and give the blondies structure. They also contribute to the overall richness of the blondies.
- Vanilla extract: The vanilla extract adds flavor to the blondies and helps to round out their overall taste.
- Gluten-free flour: The gluten-free flour in this recipe provides the structure for the blondies and helps to create a texture that is similar to traditional blondies.
- Baking powder: The baking powder in this recipe helps the blondies to rise slightly and gives them a softer, more cake-like texture.
- Salt: The salt in this recipe helps to balance out the sweetness of the blondies and enhances their overall flavor.
- Chocolate chips: The chocolate chips add a touch of chocolate flavor to the blondies and provide a bit of texture contrast. If you're making vegan blondies, make sure to use vegan chocolate chips.
- Nutella: The Nutella in this recipe adds a hint of hazelnut flavor to the blondies and helps to create a richer, more indulgent taste.

Comprehensive Ingredient Breakdown
Choosing the Right Gluten-Free Flour: Not all gluten-free flours are created equal. For these blondies, we recommend King Arthur Measure-for-Measure Gluten-Free Flour, known for its consistency and reliability in vegan recipes. This blend mirrors the behavior of all-purpose flour, ensuring your blondies have the perfect texture every time.
The Role of Sugars: A blend of light brown and granulated sugar not only sweetens these blondies but also contributes to their rich, moist texture. Adjusting the sugar ratio can customize the sweetness level, catering to all palates and making this recipe a versatile addition to your gluten-free dessert recipes.
Step-by-Step Instructions
Preparation
Preheat your oven to 350°F and grease an 8x8-inch baking pan.
Combine Wet Ingredients
In a large mixing bowl, combine the melted butter, light brown sugar, and granulated sugar.
Beat in the eggs, one at a time, followed by the vanilla extract.
Mix Dry Ingredients
In a separate bowl, whisk together the gluten-free flour, baking powder, and salt.
Combine Wet and Dry Ingredients
Gradually add the dry ingredients to the wet mixture, stirring until everything is well combined.
Add In Add-Ins
Fold in the chocolate chips and Nutella until evenly distributed.
Bake
Pour the blondie mixture into the prepared pan and smooth the top with a spatula.
Bake for 25-30 minutes, or until the edges are lightly golden brown and a toothpick inserted into the center comes out clean.
Serve
Let the blondies cool in the pan for a few minutes before slicing and serving. Enjoy!
Expert Tips
Here are a few tips to help you make the best possible gluten-free blondies:
- Use room temperature ingredients: Make sure that your butter, eggs, and Nutella are all at room temperature before you begin. This will help them to incorporate more easily into the batter and result in a smoother, more uniform texture.
- Don't overmix the batter: Once you've added the dry ingredients to the wet mixture, be sure to stir just until everything is well combined. Overmixing the batter can result in tough, dry blondies.
- Customize the add-ins: Feel free to get creative with the add-ins for these blondies. Try using a different type of chocolate chip or swap in your favorite nut butter in place of the Nutella.
- Check for doneness: The blondies are done when the edges are lightly golden and a toothpick inserted into the center comes out clean. If the toothpick comes out with wet batter on it, the blondies need more time to bake.
- Let the blondies cool before slicing: It's important to let the blondies cool in the pan for a few minutes before slicing and serving. This will help them to set up and make them easier to slice.
Variations for Blondies
Here are a few ideas for variations on this recipe for gluten-free blondies:
- Add nuts: Try stirring in a cup of your favorite chopped nuts, such as walnuts, almonds, or pecans.
- Swap in a different nut butter: Instead of using Nutella, try using a different type of nut butter, such as peanut butter or almond butter.
- Mix in dried fruit: Dried cranberries, cherries, or apricots would all be delicious mixed into the blondie batter.
- Use white chocolate chips: For a change of pace, try using white chocolate chips instead of the semi-sweet vegan chocolate chips called for in the recipe.
- Add a layer of frosting: Once the blondies are cooled, try spreading a layer of your favorite frosting over the top. A simple cream cheese frosting would be delicious, or you could try a chocolate ganache for a extra decadent treat.
Baking Tips for Perfect Blondies Every Time
Achieving the Perfect Bake: The key to perfect blondies lies in their baking time. Too long in the oven, and they lose their moistness; too short, and they might be undercooked. We recommend the toothpick test — when a toothpick comes out with a few moist crumbs, your blondies are done. This tip is crucial for anyone looking to master gluten-free vegan desserts.
Customizing Your Blondies: Our recipe is a fantastic base for adding your personal touch. Consider folding in nuts or swirls of peanut butter before baking for added texture and flavor. These customizations can make the recipe uniquely yours, showing the versatility of vegan baking.
Ingredient Substitutions
Here are a few ingredient substitutions that you can try in this recipe for gluten-free blondies:
- Instead of butter, you can use a neutral-flavored oil, such as canola oil or vegetable oil. Just be aware that the blondies may have a slightly different texture and may not be quite as rich.
- If you don't have light brown sugar on hand, you can use dark brown sugar instead. The blondies will have a slightly deeper flavor and may be slightly moister.
- If you're not following a gluten-free diet, you can use regular all-purpose flour in place of the gluten-free flour.
- If you don't have vegan chocolate chips, you can use regular chocolate chips or chop up a chocolate bar and use that instead.
- If you don't have Nutella, you can use a different type of nut butter, such as peanut butter or almond butter. Alternatively, you can omit the nut butter entirely and just use more chocolate chips.

Blondie Ingredient Additions
There are many delicious ingredients that you can add to these gluten-free blondies to give them an extra flavor boost! Some tasty options include:
- Butterscotch chips: Butterscotch chips will add a sweet and rich flavor to the blondies.
- Dark chocolate chips: For a deeper chocolate flavor, try using dark chocolate chips in place of the semi-sweet chocolate chips.
- Peanut butter chips: Peanut butter chips will add a nutty and creamy flavor to the blondies. You can also try using crunchy peanut butter for added texture.
- Nuts: Chopped nuts, such as almonds, pecans, or walnuts, will add a crunchy texture and a rich flavor to the blondies.
- Coconut: Shredded coconut will add a tropical twist to the blondies and give them a chewy texture.
- Dried fruit: Chopped dried fruit, such as cranberries, cherries, or raisins, will add a burst of sweetness and a chewy texture to the blondies.
- Spices: Try adding a pinch of spices, such as cinnamon or nutmeg, to the blondie mixture for a warm and flavorful twist.
You can mix and match these ingredients to create your own unique blondie flavor combinations. Be sure to adjust the amount of each ingredient to your taste preferences. Happy baking!
Best Gluten Free Flour
There are many different types of gluten-free flour blends available, and the best one for this recipe will depend on your personal preference and dietary needs. Some popular options for a flour blend that have xanthan gum include:
- King Arthur Measure-for-Measure Gluten-Free Flour: This flour is a blend of white rice flour, potato starch, whole grain sorghum flour, and other ingredients. It is designed to be a direct replacement for all-purpose flour in most recipes, including this one for blondies.
- Cup4Cup Gluten-Free Flour: This is another all-purpose gluten-free flour that is made from a blend of white rice flour, cornstarch, and potato starch. It is also a good choice for this recipe.
Ultimately, the best gluten-free flour for this recipe will be one that produces blondies with a texture that you like and that is also easy for you to work with. If you're not sure which flour to use, you may want to try a few different types to see which one you prefer.
Can I make these blondies vegan?
Yes, it is possible to make this classic blondies recipe dairy free by using plant-based alternatives to the butter and eggs called for in the recipe. Here are a few options to consider:
- Butter substitute: Instead of using butter, you can use a dairy-free butter in this blondies recipe. Look for a product that is made from a plant-based oil, such as coconut oil or olive oil.
- Egg substitute: There are several options for replacing the eggs in this recipe. One option is to use a "chia egg," which is made by mixing together 1 tablespoon of ground chia seeds and 3 tablespoons of water. Another option is to use a commercial egg replacer, such as Ener-G Egg Replacer. I find that a flax egg gives the blondies an especially fudgy texture.
Try my recipe for the BEST Gluten Free Vegan Blondies on my blog!
Recommended Equipment
To make this recipe for gluten-free blondies, you will need the following equipment:
- An 8x8-inch baking pan: This is the size of pan that the blondies are baked in. You can use a metal pan or a glass or ceramic pan, whichever you prefer.
- A large mixing bowl: This is where you'll combine the wet ingredients for the blondies.
- A separate bowl: You'll need a second bowl to mix the dry ingredients together in.
- A whisk: You'll need a whisk to stir the dry ingredients together.
- A spatula: You'll use a spatula to scrape the blondie mixture into the pan and smooth the top.
- Measuring cups and spoons: You'll need measuring cups and spoons to measure out the ingredients for the blondies.
- An oven mitt or hot pad: You'll need something to protect your hands when you take the blondies out of the oven.
- A cutting board and knife: You'll use these to slice the blondies into squares once they are baked and cooled.
Looking for a delicious gluten-free brownie recipe? Check out my gluten-free double chocolate brownies on my blog!
How to Freeze Blondies
Freezing blondies is a great way to extend their shelf life and have a sweet treat on hand whenever the craving strikes. Here's how to freeze blondies:
- Allow the blondies to cool completely: After the blondies are baked and cooled, slice them into squares and arrange them on a sheet of parchment paper.
- Place the blondies in the freezer: Transfer the blondies to the freezer and freeze them until they are solid, which will take a few hours or overnight.
- Transfer the blondies to an airtight container: Once the blondies are frozen solid, transfer them to a container or zip-top bag. Make sure to label the container with the date and contents.
- Freeze for up to 3 months: The blondies can be stored in the freezer for up to 3 months.
To serve the blondies, simply remove them from the freezer and let them thaw at room temperature for a few minutes before enjoying them. Alternatively, you can microwave the blondies for a few seconds to soften them up. Enjoy!
Is Nutella Gluten Free?
According to the manufacturer, Nutella is gluten-free and does not contain any gluten-containing ingredients. However, the product is made in a facility that also processes wheat, so there is a risk of cross-contamination with gluten.
If you have celiac disease or a severe gluten intolerance, you may want to avoid Nutella or choose a different type of nut butter that is produced in a dedicated gluten-free facility. There are many other brands of gluten-free nut butter available that do not carry the same risk of cross-contamination.
Storage Instructions
To store these gluten-free blondies, first let them cool completely to room temperature. Once cooled, you can slice the blondies and store them in an airtight container at room temperature for up to 3-4 days. If you want to keep them fresh for longer, you can store the blondies in the refrigerator for up to 1 week.
You can also freeze the blondies for longer storage. To do so, wrap the blondies in plastic wrap and then in aluminum foil, or place them in a freezer-safe container or bag. The blondies will keep in the freezer for up to 3 months. To thaw, simply place the blondies on the counter at room temperature until they reach your desired level of softness. Alternatively, you can microwave the blondies for a few seconds to soften them up. Enjoy!

How do I Perfectly Cut Blondies?
To perfectly cut blondies, it's important to use a sharp knife and to clean it between cuts to ensure clean, even slices. Here are some tips for cutting blondies:
- Allow the blondies to cool completely before cutting. If the blondies are still warm, they will be too soft and will crumble when you try to cut them.
- Use a sharp, serrated knife to cut the blondies. A sawing motion will help you get clean, even slices without squashing the blondies.
- Wipe the knife clean between cuts to remove any stuck bits of blondie. This will help you get clean, even slices and will also prevent the knife from getting stuck as you cut.
- If the blondies are particularly sticky or difficult to cut, try dipping the knife in hot water before making each cut. This will help the knife glide through the blondies more easily.
- Cut the blondies into small, bite-sized pieces for a more elegant presentation, or into larger squares for a more casual gathering.
By following these tips, you should be able to cut your blondies into perfect, even slices every time. Enjoy!
FAQ
Unfortunately, regular flour is not a suitable substitute for gluten-free flour in this recipe. Gluten-free flour is formulated specifically to be used in recipes for people who are intolerant to or allergic to gluten, and it has a different chemical composition than regular flour. Using regular flour in this recipe may result in blondies that are too dry or dense, or that do not hold together properly.
You can try using another type of sugar in this recipe, such as brown sugar or coconut sugar, but keep in mind that this may alter the flavor and texture of the blondies. White sugar is a key ingredient in this recipe because it helps to create the moist, dense, and fudgy texture of the blondies.
Yes, you can use another type of chocolate in this recipe, such as dark chocolate or milk chocolate. You can also try using chocolate chips or chopped chocolate bars, depending on what you have on hand.
Yes, you can make this recipe in a different size pan, but keep in mind that this will affect the thickness and baking time of the blondies.
Absolutely. While nuts add a lovely crunch, they can be omitted for those with allergies, showcasing the adaptability of gluten-free recipes.
To keep your blondies moist and delicious, store them in an airtight container at room temperature. They can last up to a week, ensuring you have a sweet treat on hand whenever the craving strikes.
Yes, this recipe is easily doubled for larger gatherings. Just remember to adjust the baking time accordingly to ensure every bite is as perfect as the last.
The BEST Easy Gluten Free Blondies (vegan option)
Equipment
- Mixing bowl set
- A whisk
- A spatula
- An oven mitt or hot pad
- A cutting board and knife
Ingredients
- 2 sticks of butter melted
- ⅔ cup light brown sugar
- ⅓ cup granulated sugar
- 3 eggs
- 1 teaspoon vanilla extract
- 2 cups gluten-free flour
- ½ teaspoon baking powder
- ½ teaspoon salt
- ½ cup semi-sweet chocolate chips
- ¼ cup Nutella
Instructions
- Preheat your oven to 350°F and grease an 8x8-inch baking pan.
- In a large mixing bowl, combine the melted butter, light brown sugar, and granulated sugar. Beat in the eggs, one at a time, followed by the vanilla extract.
- In a separate bowl, whisk together the gluten-free flour, baking powder, and salt.
- Gradually add the dry ingredients to the wet mixture, stirring until everything is well combined.
- Fold in the chocolate chips until evenly distributed. Add dollops of nutella on top and use a knife to swirl it around.
- Pour the blondie mixture into the prepared pan and smooth the top with a spatula.
- Bake for 25-30 minutes, or until the edges are lightly golden brown and a toothpick inserted into the center comes out clean.

Anonymous says
Yum!!!!